

Facebook Ads: Starting Strong With These 5 Steps
From a marketing and advertising point of view, Facebook Ads offers a range of options for merchants to target audiences based on their interests, buying habits, life events, demographics, or geographical locations. Facebook has access to a vast user database with various data points that merchants can utilize to create campaigns that meet their business goals and achieve better results.
Facebook ads can appear across its different placements, such as in the users’ feeds, stories, messenger, marketplace, Instagram feeds, stories, and more. They look similar to regular posts. The only difference is that they have a “sponsored” label with extra information like call-to-action buttons, links, and product catalogues.
Advertising on Facebook can help you reach both new and existing audiences, encouraging them to take action through different campaigns based on the desired purpose, such as raising awareness, driving engagement, boosting sales, or retargeting.
Steps to follow before getting started with Facebook Ads
1: Set Up Your Facebook Business Assets
Create a Personal Facebook Profile: Owning a personal Facebook profile is the first step to reaching Facebook Ads. If you don’t already have one, sign up for a personal Facebook profile.
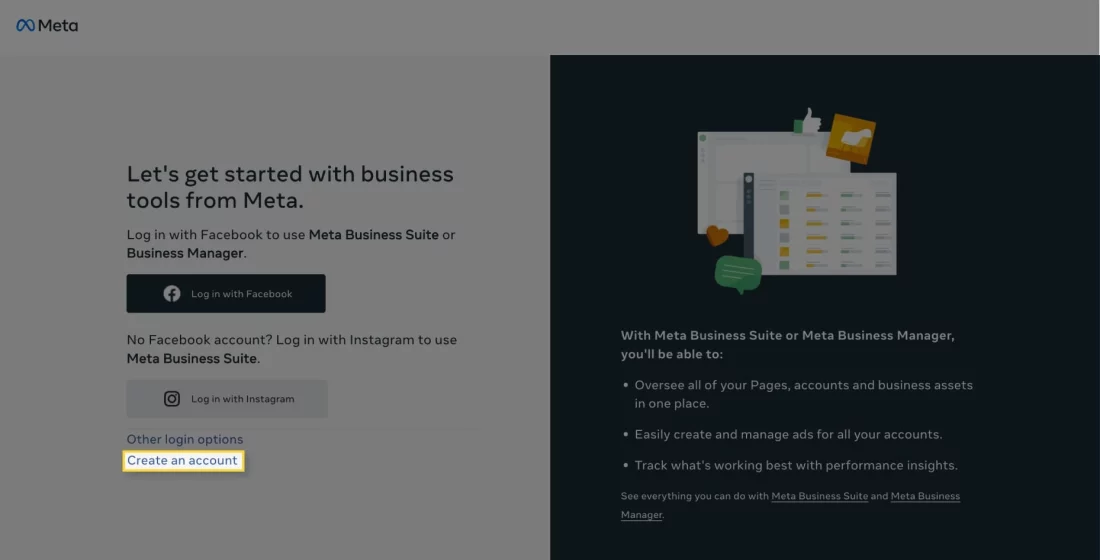
Create a Meta Business Manager Account: Go to business.facebook.com and set up a Business Manager account using your personal Facebook Profile from where you can manage your Facebook Ads, Page, Audiences, Pixels, and Catalogues.
2: Create or Connect Your Facebook Page
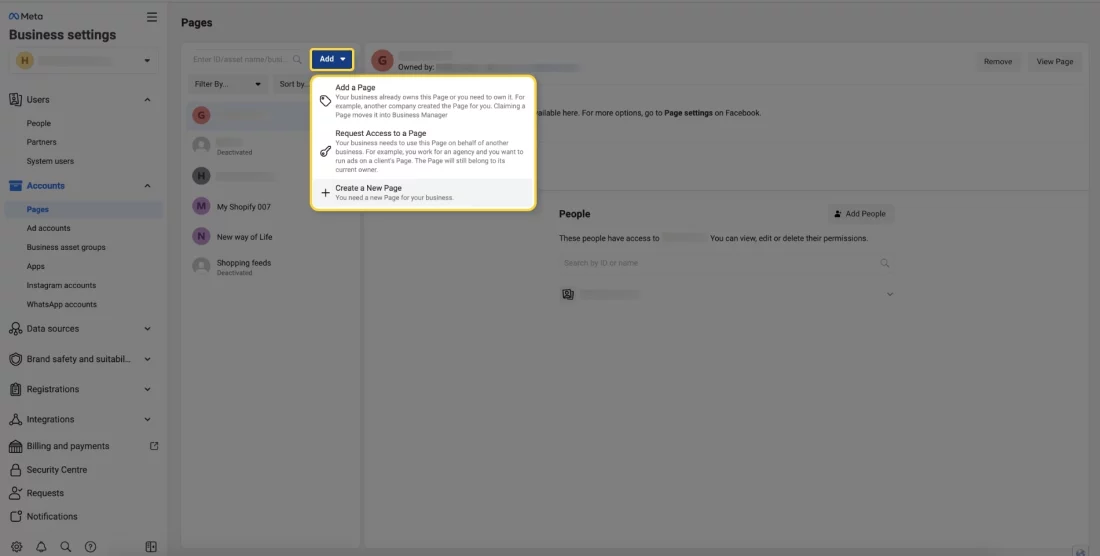
Create a Facebook Page: If you don’t have a Facebook page for your store, you may create one directly from your Business Manager Account. If you already have it, connect it to your Business Manager Account.
Pro-Tip:
Whenever you create a Meta Business Manager account, give yourself full access to all asset management levels and add more than one administrator to the Business Manager account. In case, Facebook blocks your personal profile, you can still use the other profile to access your Business Manager account.
3: Verify Your Store Domain
After you have connected your Facebook Page, the next step would be to verify your store domain in your Business Manager Account. Below are the three ways through which you can verify your store domain:
- Add a meta tag to your HTML source code.
- Upload an HTML file to your web directory and confirm your domain in the Business Manager.
- Add a DNS TXT entry to your DNS record to confirm ownership of your domain.

4: Set Up a Meta Pixel
Create a Meta Pixel: If you have a website, set up a Meta Pixel in your Business Manager account. It will allow you to track website activity and optimize your Facebook Ads campaigns.
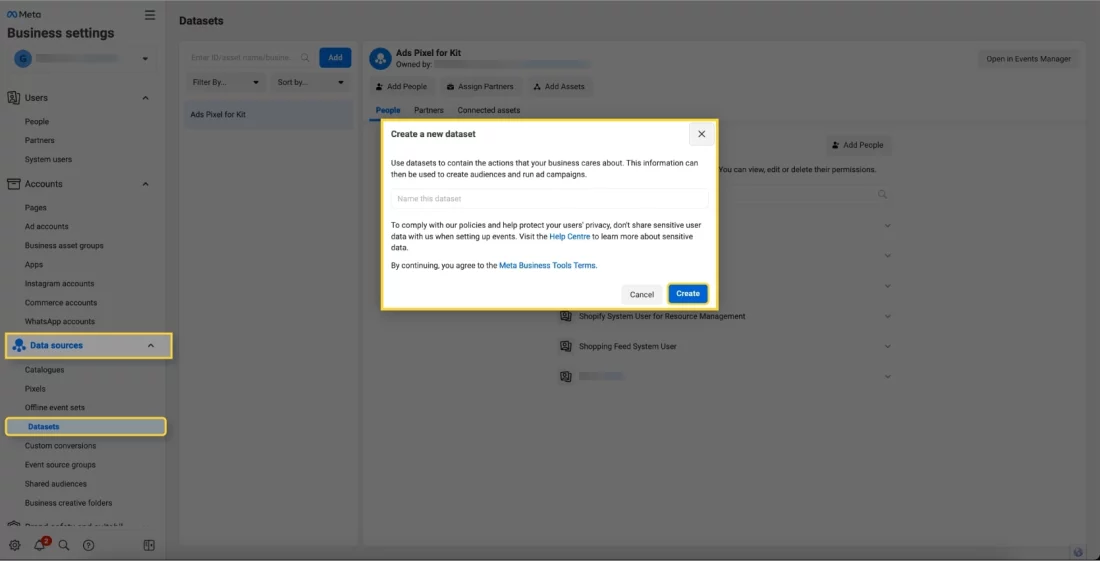
Note: Facebook is now automatically converting the pixel to a dataset to easily connect and manage event data from different sources in one place. To manage the pixel settings you have created, you will have to navigate to the datasets option under the Data Sources tab.
5: Add a Catalogue to your Commerce Manager Account
Access Commerce Manager: To add a catalogue, navigate to the Commerce Manager in your Business Manager account.
Create a Catalogue: Click “Data Sources” and then “Catalogues.” Create a new catalogue and choose the appropriate type per your requirements.
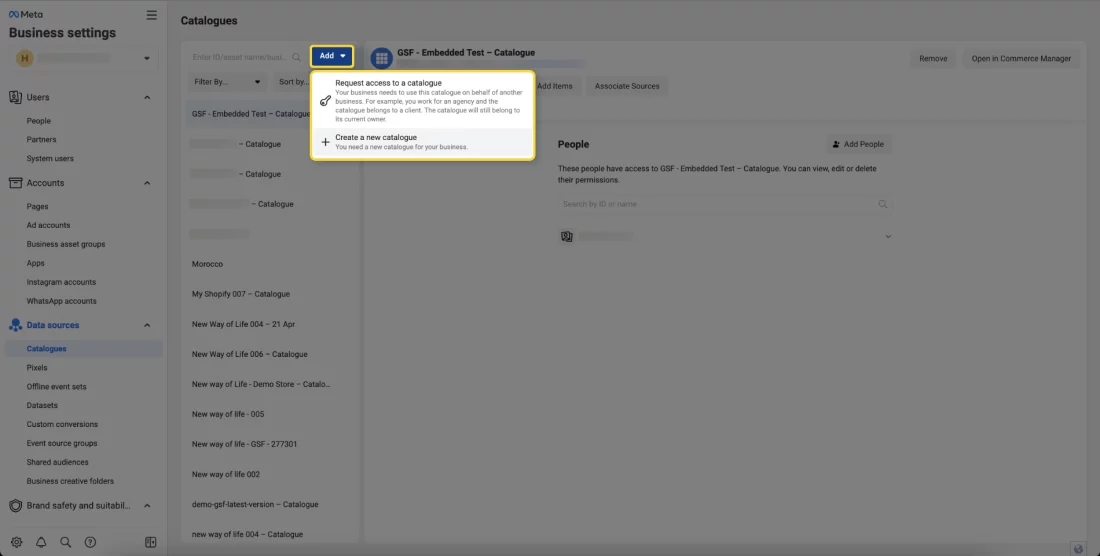
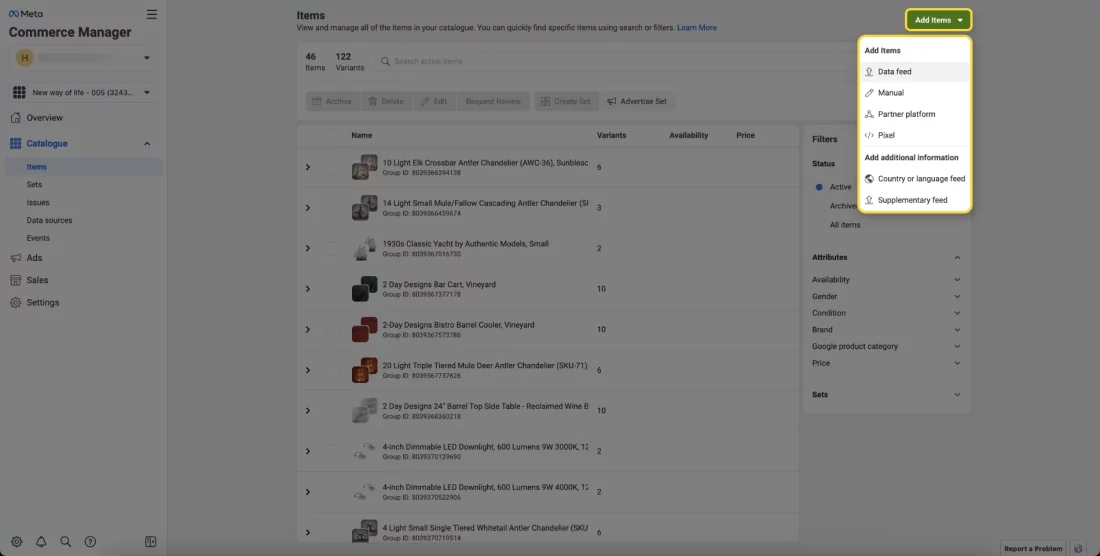
Add Products: Add the required products to the catalogue manually or by connecting your product data feed using various options as shown in the below screenshot.
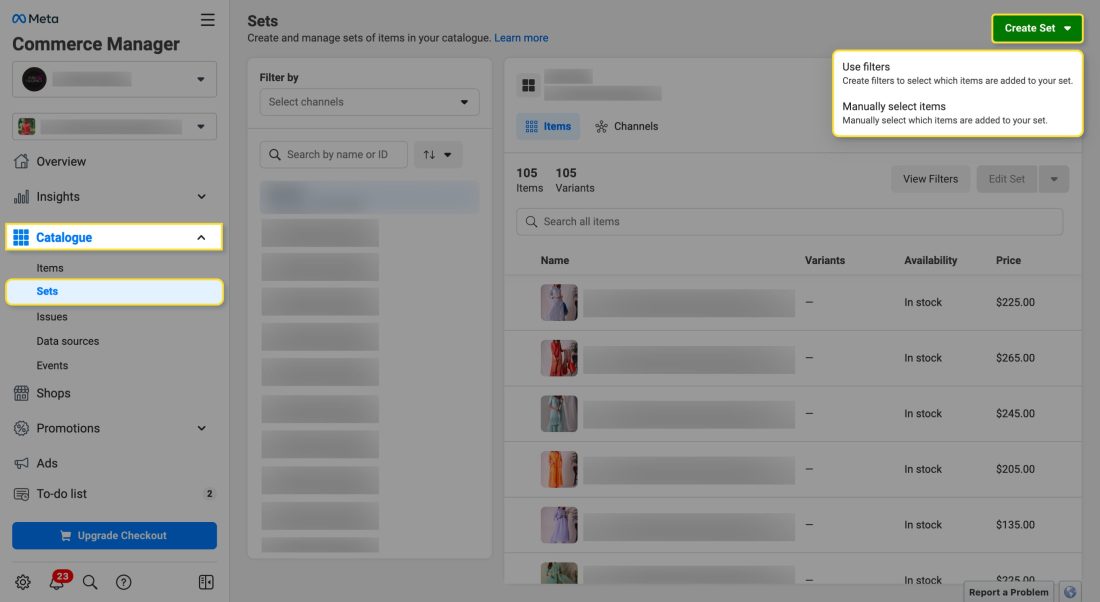
Create Product Sets: Within your catalogue, you can create product sets. These are the subgroups of your items, which can be convenient for organizing products and creating specific ads or promotions for a group of products. Click on the “Create Set” option from the “Sets” tab in your Catalogue.
Connect your Catalogue to a Meta Pixel: Once you have set up the pixels and your catalogue, ensure that you connect your catalogue to a Meta Pixel or dataset. This can be done from the “Events” section under the Catalogue tab. It will let you track whether the items that people are interacting with on your website or app are in your catalogue.
So, these are the steps you should follow before creating your Facebook Ads campaign. The next part of this blog will guide you on how to create, manage, and monitor your Facebook campaigns and efficiently optimize them. Stay tuned for more tips and tricks on Facebook Ads.
Leave a Reply